Make sure Freespace mode is selected in the Camera tab. Target an activity class present in Scene contents, as described in Tutorial Part 1.
Step 2: Target Menu
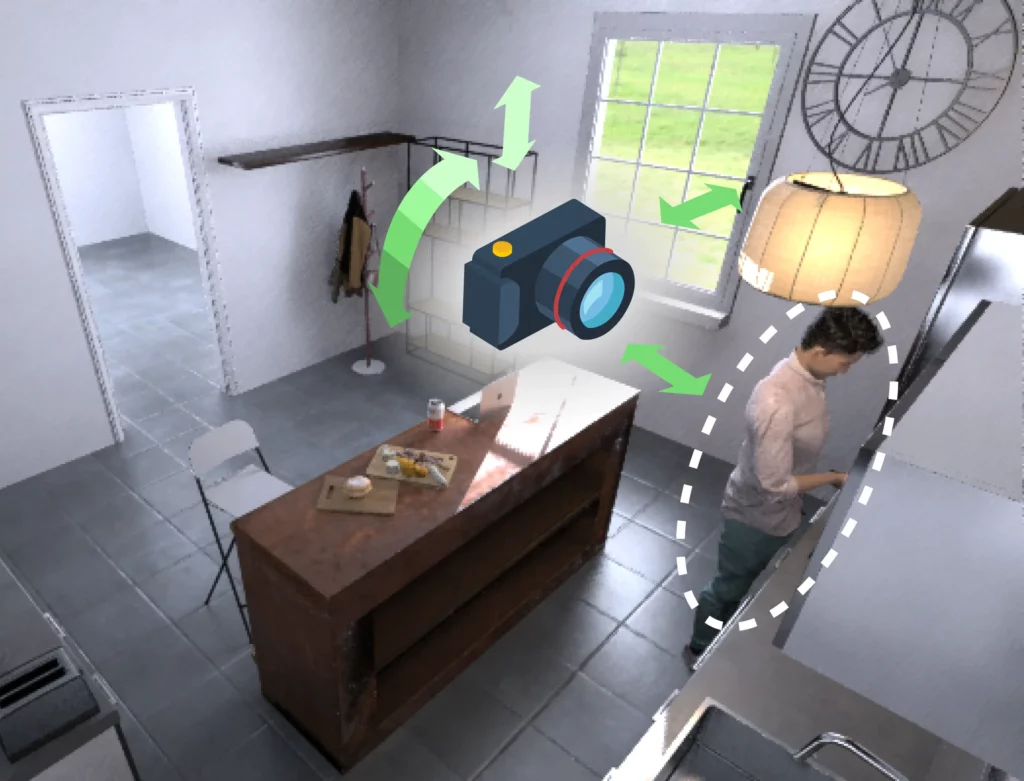
Click on the tile of a target object class and an option menu will appear. Here you can adjust:
which specific part of the activity is targeted (actor’s body, face, tool…).
camera distance to the activity
whether the specific target is right at the image center or anywhere in the image
Note that these constraints will be combined with the ones in the Camera position section.
Step 3: Zoom on Target
Instead of specifying a camera-object distance, you can choose to automatically adjust camera parameters so that the target takes up a certain proportion of the image. Zoom can be greater than 100%. In that case, only a part of the target is visible in the image.
Here, by targeting the Tool (laptop) and setting camera zoom, we adjust which proportion of the image is covered by the laptop’s bounding box.
Step 4: Object-centric camera position
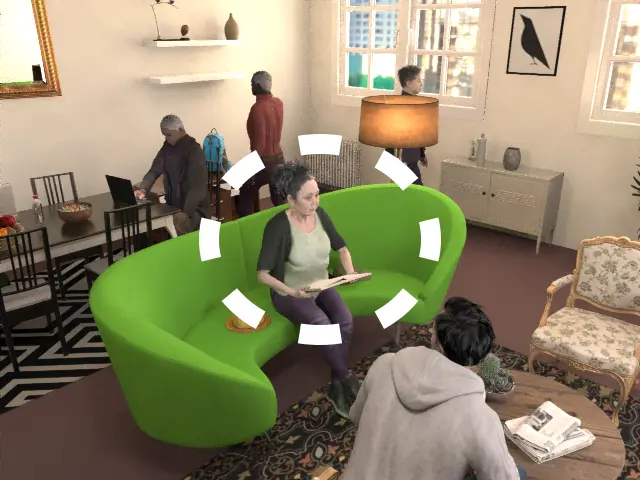
In the Camera position tab, you can select “Object-centric” mode in order to set a view angle range instead of specifying a camera zone as minimum and maximum height. In this example, this batch is configured to generate top views of the target.
Tutorials
How to target objects with a random camera
In this tutorial, we’ll show you how to adjust how we target an object in the camera Freespace mode.
This tutorial is part of a series on Freespace camera mode:
Start by using Freespace camera mode and targeting an object class, as shown in Tutorial part 1
Step 2: Target Menu
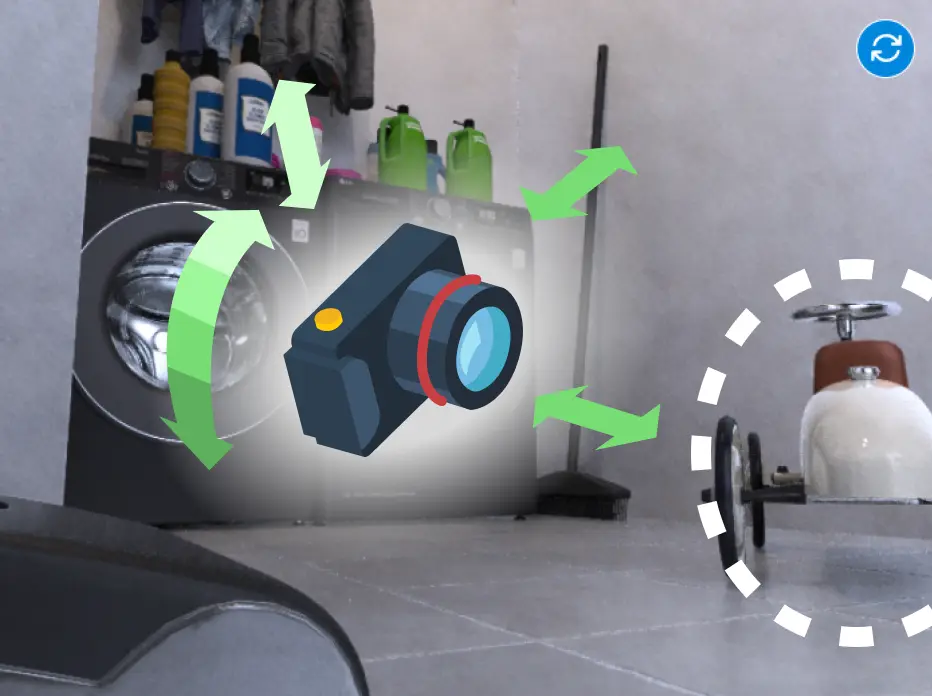
Click on the tile of a target object class and an option menu will appear. Here you can adjust:
camera distance to the object
whether the object is a image center or anywhere in the image.
Note that these constraints will be combined with the ones in the Camera position section.
You can also select support surfaces on which the target object should be. This is just a hint for the engine, and will work if the same support surface is selected for the object class in Scene contents. (see the Tutorial on objects)
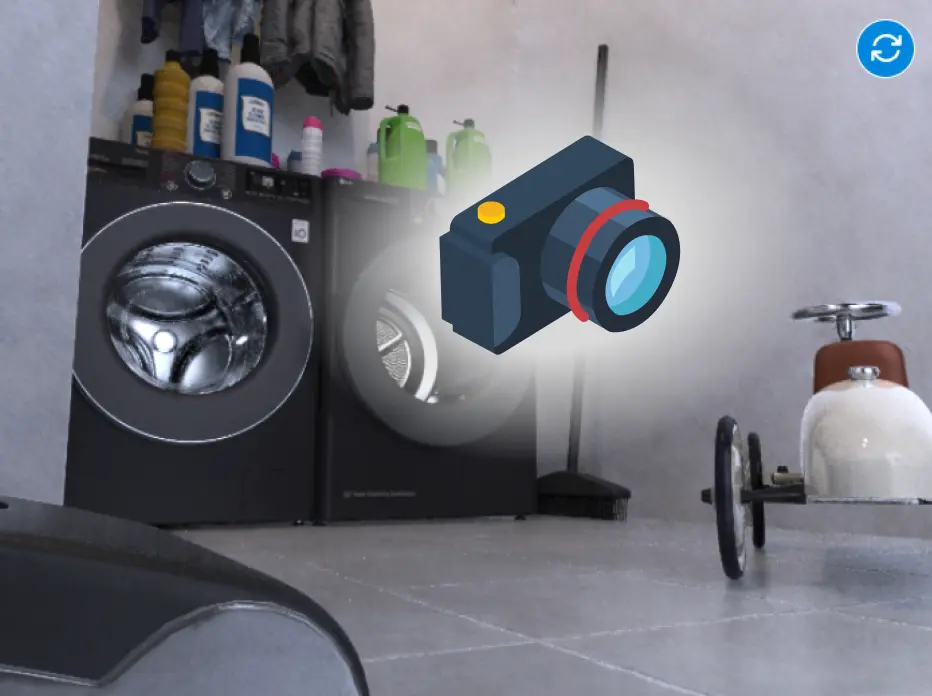
Step 3: Zoom on Target
Instead of specifying a camera-object distance, you can choose to automatically adjust camera parameters so that the object takes up a certain proportion of the image. Zoom can be greater than 100%. In that case, only a part of the object is visible in the image.
Step 4: Object-centric camera position
In the Camera position tab, you can select “Object-centric” mode in order to set a view angle range instead of specifying a camera zone as minimum and maximum height. In this example, this batch is configured to generate top views of the targets.
Step 5: Targeting multiple Objects
Each collection in Scene contents can be added to targets. By assigning percentages to multiple targets, you control how many images in the dataset will target one object class or another.
You can preview an image for each target by using the eye icon on its tile. This will refresh the preview window.
Tutorials
How to control random camera placement in scenes
In this tutorial, we’ll show you how to create synthetic datasets captured with a camera placed randomly in 3D scenes, according to constraints you define.
This tutorial is part of a series on Freespace camera mode:
In this mode, the camera moves freely in the scene while respecting constraints you set.
Step 2: Adjust camera position range
In the Camera position section, toggle the switch to add a height constraint. Use the double slider to select a height range.
Use the double slider to add a tilt constraint to limit the camera’s vertical movement.
Step 3: Preview
You can preview an image with targets by selecting “Sample camera POV” on top of the preview window and hitting the refresh preview button.
Step 4: Add a target (optional)
In the Targets section, choose whether to target objects or people doing activities.
If you choose to target objects, click on the “+” icon to add an object target.
elect the desired object class from the list of targetable classes or add it to the Scene contents first if it’s not present.
You can adjust the parameters for each target if needed, and assign percentages to targets to create variability in the images when generating datasets.
Step 5: Preview random image with target
You can preview an image with targets by repeating step 3.
Alternatively, you can preview a single target by hitting the preview button on its tile in the camera targets section.
Tutorials
How to add activities to scenes
In this tutorial, we’ll show you how to add people performing activities to your scenes and adjust the contents of your next computer vision dataset.
Select the “Activities” tab located in “Scene contents”, and click on the “Add Object” button.
Step 2: Activities Catalog
Explore the catalog and select the activity class you want.
You can also use the search bar to find a specific type of activity.
Step 3: Adjust Parameters
To customize the activity collection, click on the collection and open the modal.
From there, you can adjust various parameters such as actor gender, body type, ethnicity, and facial expressions/emotions.
Step 4: Activity locations
Select one or more locations where the activity can take place. Locations compatible with the current activity class and environment are displayed.
Step 5: Preview
To see your scene in action, click the refresh button in the preview window.
This will generate a scene on the fly and show you an image captured from the scene.
Tutorials
How to add objects to scenes
In this tutorial, we’ll show you how to use our powerful data generation app to add objects to your scenes and adjust the contents of your next computer vision dataset.